The Sound Designer's Script: How to Build Custom Voice Tracks That Match Your Video's Visual Pacing
Discover a step-by-step workflow for writing, generating, and mixing custom voice tracks. Learn how to align vocal delivery with your visual cuts to keep viewers hooked.
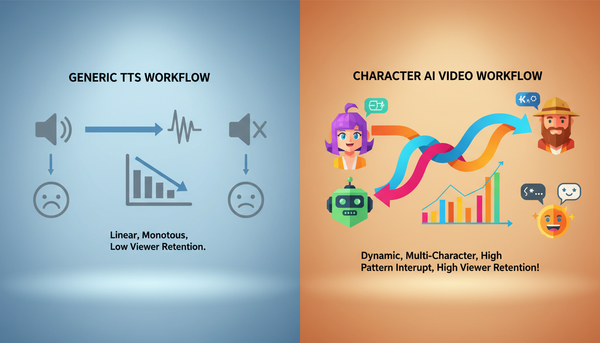
Most video editors spend hours color grading, mapping transitions, and choosing the perfect background music, only to slap a flat, robotic voiceover on top at the very last second. It is an afterthought that instantly breaks the illusion. When a voice track sounds like a generic text-to-speech engine reading a terms-of-service agreement, viewers don't just notice—they scroll away. The mismatch between dynamic visuals and lifeless audio creates an immediate drop in engagement.
Truly engaging video content relies on a delicate dance between what is seen and what is heard. To build video projects that keep audiences locked in, you must treat the voice generation process as an exercise in active direction. By mastering script formatting for spoken audio, choosing the right character profiles, and mixing with professional post-production techniques, you can turn a basic voiceover into the driving force of your video's visual pacing.
Why Most Custom Voice Tracks Kill Video Retention (And How to Fix It)
When viewers watch a video, their brains constantly try to reconcile visual information with auditory cues. If your video features fast-paced visual cuts, bright colors, and dynamic motion graphics, but the voiceover is a flat, uninspired monotone, it triggers a cognitive mismatch. The viewer's brain registers the audio as boring background noise, overriding the excitement of the visuals. This disconnect is one of the primary reasons for early drop-offs on platforms like YouTube, TikTok, and Instagram Reels.
The secret to fixing this lies in audio-first editing. Instead of editing your footage first and trying to squeeze a voiceover into the remaining gaps, your voice track should dictate your cuts. A high-impact edit uses the natural rhythm, pauses, and emotional peaks of the spoken word to signal when a visual transition should occur. If a voice actor—or an AI voice engine—takes a dramatic pause, that is your cue to hold on a powerful visual frame or cut to a new scene on the very next syllable.
To achieve this level of synchronization, creators are moving away from generic text-to-speech tools and toward platforms that offer expressive, character-driven performances. Using Fanfun, editors can select distinct, highly recognizable AI personas that carry built-in dramatic timing, humor, and energy. This allows you to generate voice tracks that actually feel like they belong in the scene, rather than sitting awkwardly on top of it. Our guide on directing custom AI voiceovers for high-retention TikToks offers deeper strategies for keeping viewers hooked past the three-second mark.
Writing Scripts Specifically for the Ear (Not the Eye)
Writing a script that is meant to be spoken is fundamentally different from writing an article or a social media caption. Written language is full of complex, multi-clause sentences that the brain processes easily when reading. However, when those same sentences are spoken aloud, they sound incredibly unnatural, stiff, and difficult to follow. To build a voice track that flows seamlessly, you must write specifically for the ear.
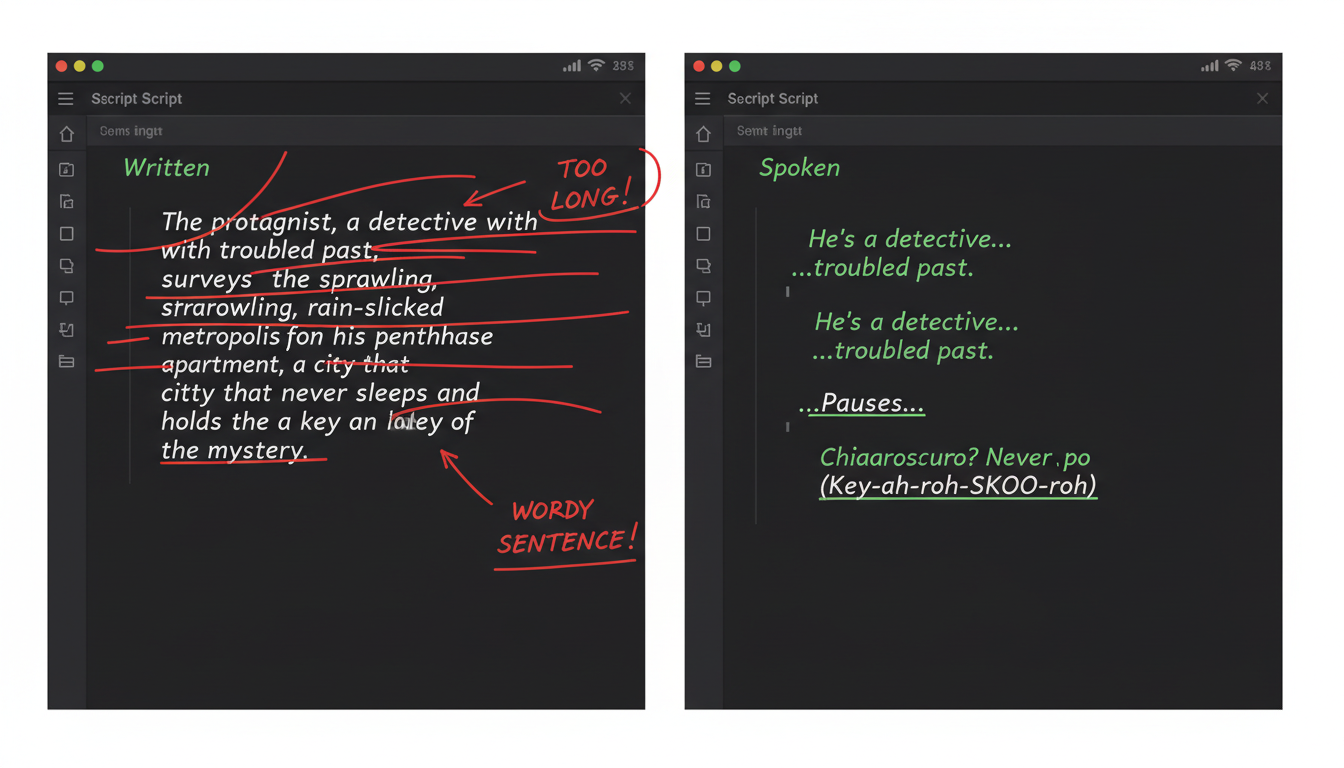
This means prioritizing short sentences, active verbs, and conversational transitions. You also need to build physical breathing room directly into your text. When using AI voice generators, the engine relies entirely on your punctuation to determine where to pause, where to raise its pitch, and where to drop its tone. If you write with perfect, formal grammar, the output will sound like a textbook. If you write with creative, rhythmic punctuation, the output will sound like a human.
Here are three simple punctuation hacks to force natural pacing in custom voice tracks:
- The Ellipsis (...): Use these to create dramatic pauses, suspense, or a natural transition between ideas. It tells the generator to hold the silence for a beat before continuing.
- The Em-Dash (—) or Hyphen (-): Use these to simulate a sudden shift in thought or a conversational interruption, mimicking how people actually talk when they are excited.
- Phonetic Spelling: If a voice engine struggles with a brand name, a slang word, or a specific emphasis, spell it phonetically (e.g., writing "pro-teen" instead of "protein" to force a harder emphasis on the first syllable).
The "Before and After" Script Makeover
To see how this works in practice, compare these two versions of the exact same message. Notice how the spoken version uses punctuation and sentence structure to design natural audio pacing:
Before (Written for the Eye):
"To achieve optimal results when utilizing our platform, it is highly recommended that users first select a character voice that aligns with their brand identity before generating any audio files so that the final product is cohesive."After (Written for the Ear):
"First step... pick your character. If the voice doesn't match your brand? The whole video falls apart. Choose wisely... then hit generate."
Directing Your Voice Assets: Matching Tone to Video Format
Not every video requires the same vocal energy. A high-octane TikTok promo needs a completely different delivery style than a cinematic video essay or a comedic meme edit. One of the biggest mistakes editors make is using a single, middle-of-the-road voice profile for every project they tackle. To keep your pacing tight, you must match the character of the voice to the specific genre of your video.
With Fanfun's character library, you aren't limited to generic corporate narrators. You can leverage recognizable, highly stylized AI voices—ranging from sports legends and cultural icons to anime characters—to instantly set the tone of your project. Learn more about the creative process of designing custom character audio tracks to elevate your narrative storytelling.
To help you choose the right voice direction for your next edit, use this formatting and pacing framework:
| Voice Style | Ideal Video Format | Pacing Rule | Key Punctuation Hack |
|---|---|---|---|
| High-Energy Hype | TikToks, Reels, Promos | Rapid delivery, short punchy sentences, minimal pauses between phrases. | Use exclamation points and hyphens to keep the momentum high. |
| Authoritative Deadpan | Video Essays, Documentaries | Slow, deliberate cadence. Heavy emphasis on key nouns. Long pauses. | Use periods and double spaces to force a full stop after important statements. |
| Warm Storyteller | Vlogs, Tutorials, Brand Stories | Moderate speed, friendly and conversational tone, varied pitch. | Use commas and question marks to create natural, engaging vocal lifts. |
| Comedic Parody | Memes, Reaction Videos, Roasts | Erratic pacing, sudden volume peaks, theatrical pauses for comedic timing. | Use ellipses (...) right before a punchline to build anticipation. |
Post-Production Mixing: Blending Voice Tracks with Music and SFX
Once you have generated your custom voice track, the work isn't finished. How that track sits in your final audio mix determines whether it sounds professional or amateur. A common issue is "muddy audio," where the voiceover competes with the background music track, making the words difficult to understand and ruining the pacing of the video.
To fix this, you need to master three fundamental audio mixing techniques: audio ducking, equalization (EQ), and sound effect layering.
First, implement audio ducking. This is the process of automatically lowering the volume of your background music whenever the voiceover is active. In modern editing software like Premiere Pro or DaVinci Resolve, you can set this up with a couple of clicks. Aim to lower the music by 3dB to 6dB when the voice starts speaking, and have it smoothly fade back up during longer pauses in the narration.
Second, use EQ carving to create a dedicated frequency pocket for your voice track. Human voices typically sit in the mid-range of the frequency spectrum. To make your voice stand out without simply turning up the volume, apply these quick adjustments:
- Apply a high-pass filter on the voice track to cut out muddy low-end rumble below 80Hz.
- Slightly boost the presence range of the voice (between 2kHz and 5kHz) by 1dB to 2dB to add clarity.
- Go to your background music track and apply a subtle EQ cut (1dB to 2dB) in that same 2kHz to 5kHz range to make room for the voice.
Finally, utilize micro-sound effects (SFX) to emphasize key vocal delivery points. Placing a subtle camera shutter sound, a digital click, or a paper crinkle directly beneath a specific word or transition anchors the audio to the visuals. For creators building fast-paced social content, pairing your voiceover with an AI meme sound generator can help you craft viral audio assets that stand out.
The Editor's Pre-Render Checklist
Before you hit the export button on your video project, take a few minutes to step back and review the audio-visual pacing as a cohesive unit. Run through this quick checklist to ensure your voice track blends seamlessly with your edit:
- Check the Breathing Room: Ensure there is at least 0.3 to 0.5 seconds of silence or background-only audio between major thematic shifts in your script. Do not let the voice run continuously without a break.
- Verify Volume Consistency: Listen to your mix on professional studio headphones, then export a quick draft and listen to it on your mobile phone's built-in speaker. If you can't hear the voice clearly over the music on a phone speaker, your music is still too loud.
- Confirm Visual Sync Points: Ensure that your visual cuts and on-screen text pop up exactly on the stressed syllables of the voiceover, rather than a few frames before or after.
- Audit the Tone: Does the voiceover's emotional energy match the visual energy of the scene? If the video is showing an exciting action sequence, make sure your voice track isn't sounding too relaxed or passive.
How do I make my AI voiceovers sound less robotic in video edits?
To make AI voiceovers sound natural, focus on script formatting and active voice selection. Write your script using short, conversational sentences and use punctuation like ellipses (...), hyphens, and commas to force the AI generator to take natural pauses. Additionally, using a platform like Fanfun allows you to select highly expressive, character-driven AI personas that inherently carry more human-like cadence, emotion, and dramatic timing than standard corporate text-to-speech engines.
What is the best way to sync custom voice tracks with fast-paced video cuts?
The best approach is to edit your video to the audio, rather than trying to fit the audio to an already completed video edit. Generate your voice track first, place it on your timeline, and use the peaks in the audio waveform as your visual cut points. Make sure major transitions, text overlays, or visual reveals land exactly on the stressed syllables of the voiceover track for maximum impact.
How do I balance background music volume with a voiceover track?
Use a technique called audio ducking. Set your background music to automatically drop by 3dB to 6dB whenever the voiceover track is active. You should also use EQ (equalization) to carve out a pocket for the voice: apply a high-pass filter to cut low-end rumble below 80Hz on the voice track, and slightly reduce the mid-range frequencies (2kHz to 5kHz) on your background music track to prevent it from competing with the vocals.
Can I use custom character voices from Fanfun for commercial video editing?
Yes! Fanfun is designed for creators, marketers, and brands looking to scale their content creation. You can use the platform's diverse library of AI character voices to generate highly engaging, customized audio tracks for social media promos, ads, memes, and viral video campaigns instantly and affordably.